
Startup and Operation
Apply 120VAC, 60hz, 15amp power. After a few seconds, the Home-Screen is displayed, indicating cold-room functional parameters:
- Room temperature(s) and %RH corresponding to the room(s) where the sensor(s) are mounted.
- Device alarms
- Device status: Wi-Fi connection status, real-time clock, and date, door heater(s) status, etc.
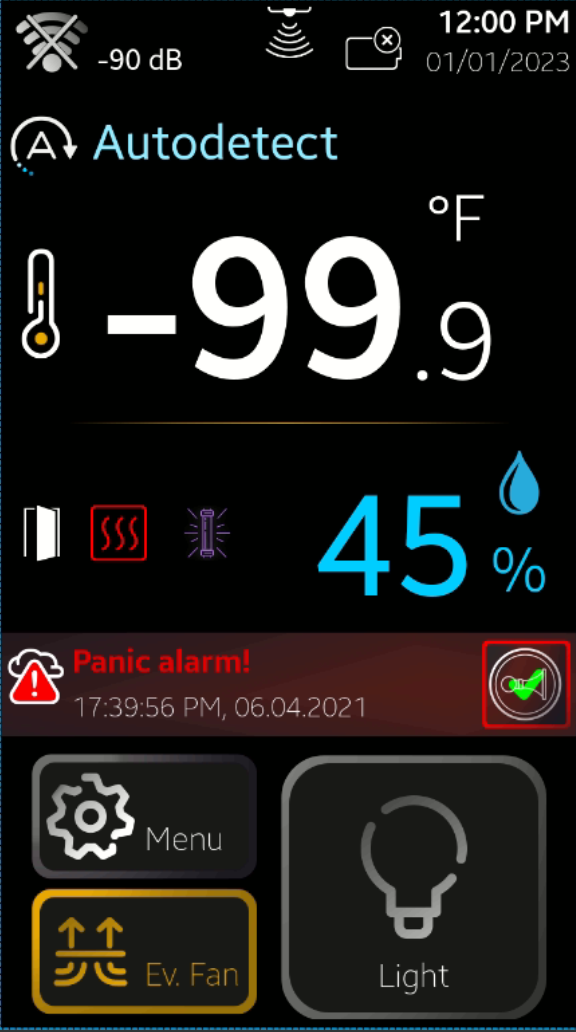
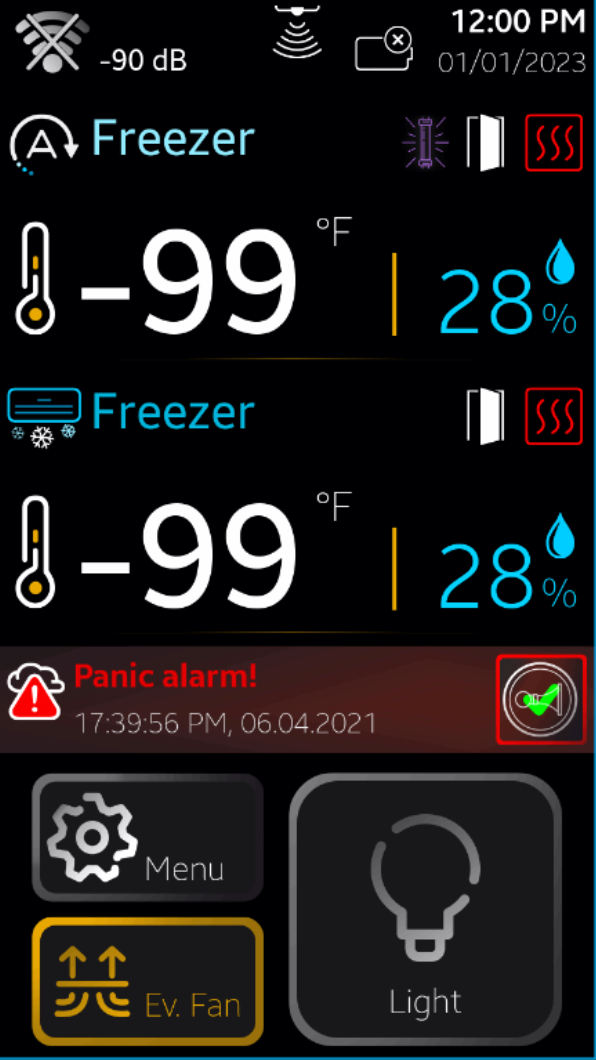
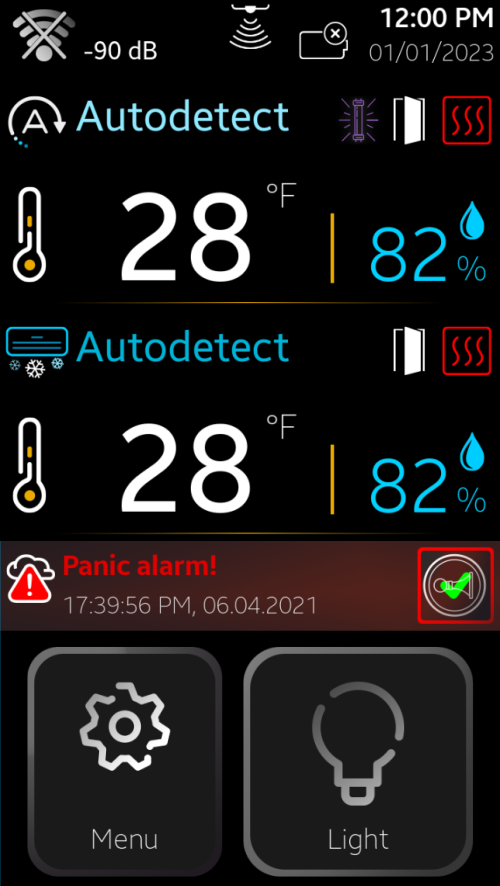
Home-Screen for the device, possible configurations:
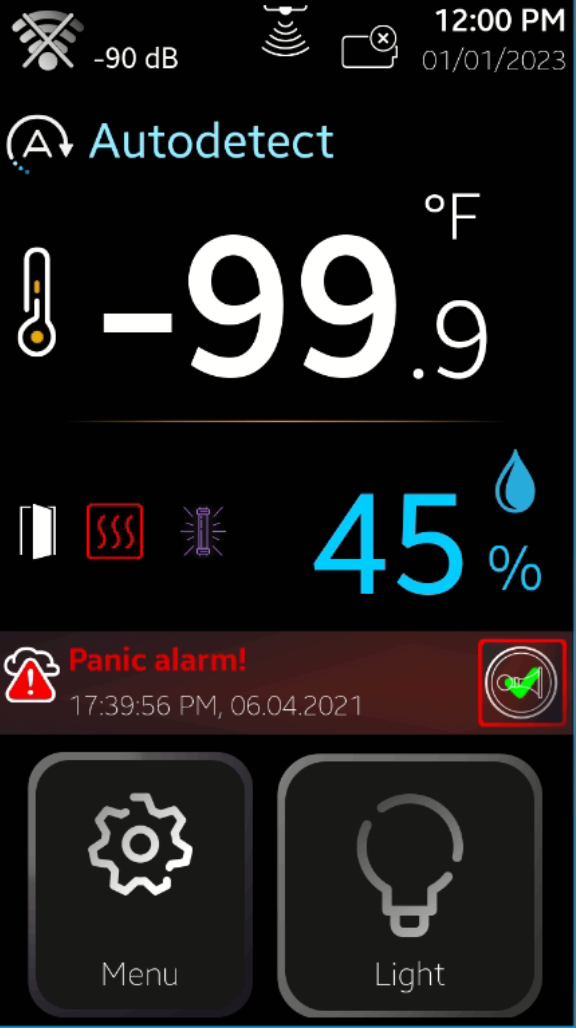
Home Screen Structure
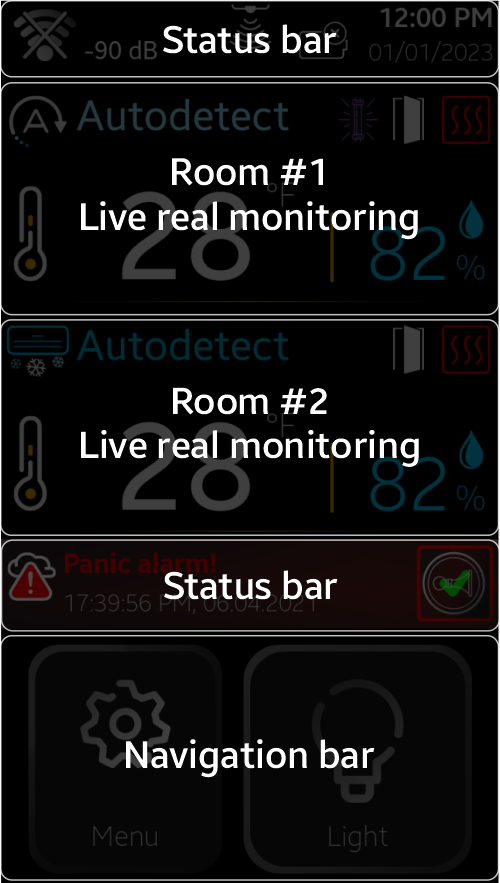
Home Screen Status Bar
If Wi-Fi connection = OFF, no icon will be displayed.
Wi-FI Connection
 = No Wi-Fi network was selected = No SSID and password was saved by the system
  = Wi-Fi No Internet
  = Wi-Fi Not Configured
  = Wi-Fi Connected to the internet
  = Connected to Server
Troubleshooting Wi-Fi Connection
When devices are able to transmit data to the cloud, the devices should display the following icon:
= Connected to Server
If this is not displayed, the devices are in one of the following states:
= The devices are not connected to the Wi-Fi router.
Troubleshooting: Reconnect the devices to Wi-Fi using the web interface or the mobile app. Select the correct SSID (Wi-Fi network name) and enter the correct password for it.
= The Wi-Fi router to which the devices are connected does not provide Internet access.
Troubleshooting: Please contact your network administrator to resolve the issue.
= Wi-Fi Connected to the internet
The device is connected to the Internet, but access to the cloud server is blocked.
Troubleshooting: Most likely, your network administrator has blocked access to Everidge’s cloud server.
Please contact your network administrator and ask them to allow access from your internal network to the Everidge server: smartrite.everidge.com.
It is normal for the system to send and receive data packages to and from the server.
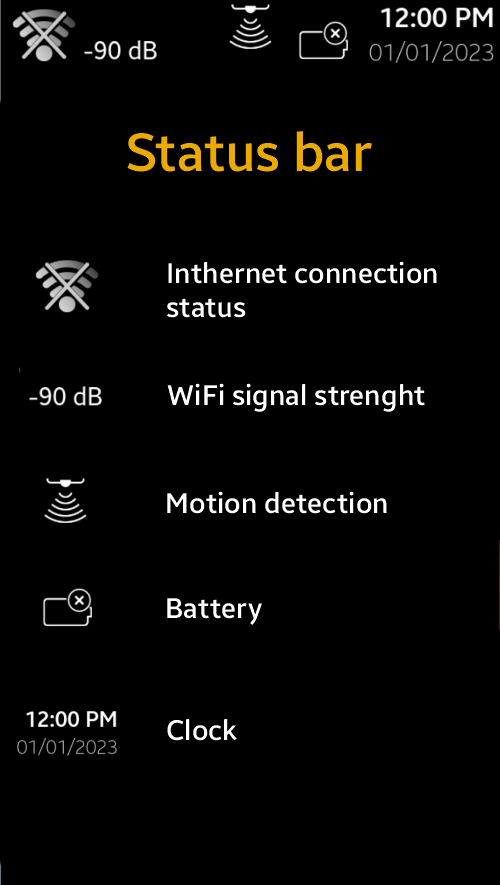
Rechargeable Battery Status
 = 0 %
= 0 %
 = 25 %
 = 50 %
 = 75 %
 = 100 %
 = Charging
Real Time Clock
08:25:01 AM = hh : mm : ss and AM/PM
07/18/2022 = month / day / year
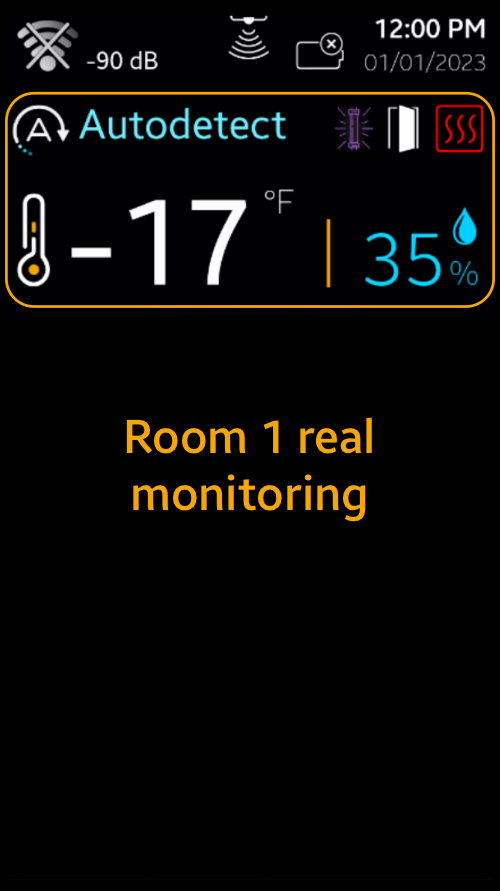
Room 1 Real-time Monitoring Area
In this area the functional parameters for room 1 are indicated:
Room 1 type:
Cooler / Freezer / Auto
Auto: indicated until the system automatically detects the type, if the system is set to autodetect the room type.
Temperature
Measured in Room 1 in °F or °C according to system settings
Humidity
[ % ] measured in Room 1
Door Open Indicator 
Indicates if the room door is opened, / if closed – the icon is hidden
Door heater for room 1 
Shown only when the heater is on. The heater is on only when the room temperature goes under a settable value (ex. Docs 35°F), set by the Start Air Temperature
The door heaters are on/off according to a PDM (Pulse Duration Modulation) cycle with an 8-minutes period; the on-time is set by the Percentage parameter in
Menu -> Settings(see 3.1.4 for details).
If the Start Air temperature is set to 35°F and the Percentage is set to 60%, it means that as long as the air temperature inside room 1 goes under 35°F, the door heater will be on for 4.8 min. (60/100 x 8min and off for 3.2min.).
Motion Detector Indicator
if the motion detector switch is active, the icon is visible only when motion is detected in room 1; in this case, the light is set on.
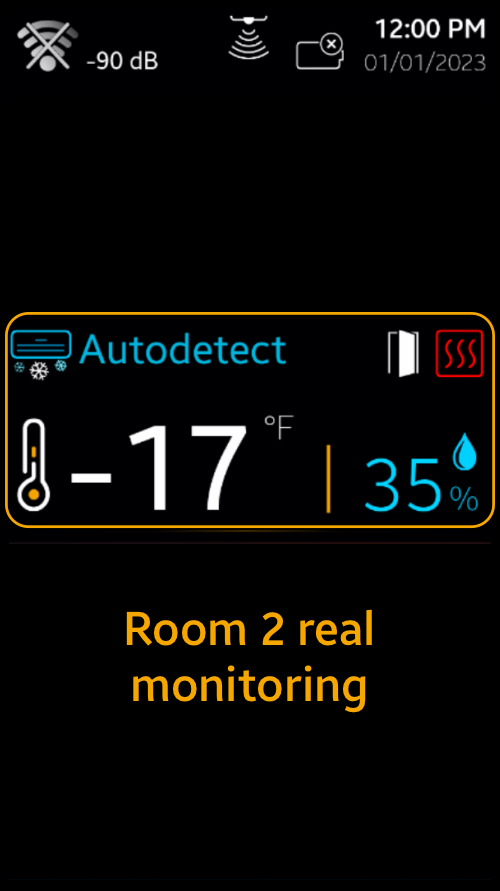
Room 2 Real-time Monitoring Area
Similar to Room 1 real-time monitoring area.
If only one room is installed, Room 2 Real-time Monitoring Area is hidden and Room 1 Real-time Monitoring Area will extend over it.
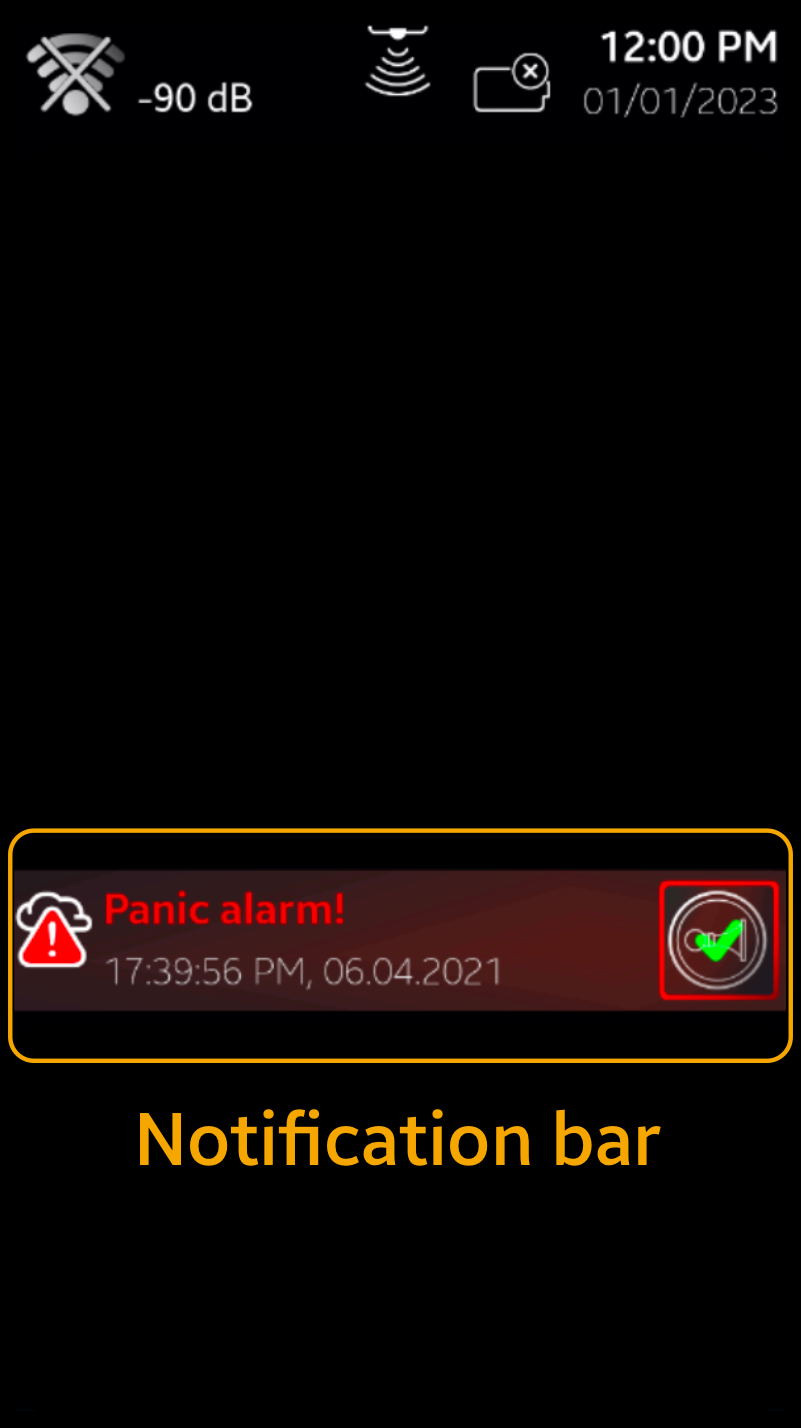
Notification Bar
If there are any active device alarms, the Home Screen will display a red Notification Bar, indicating the corresponding alarm description and time and the alarm will sound.
- “High Temp. Alarm”
- “High Temp. Alarm”
- “Low Humidity Alarm”
- “Panic Alarm”
If multiple alarms are active simultaneously, press the Notification Bar to access the Alarm Menu Screen.
Press
for every active alarm to stop the buzzer beeping. The buzzer symbol will mark it. This silences and resets the alarm beeper, however, the visual alarm(s) will still be displayed as long as the alarms remain active
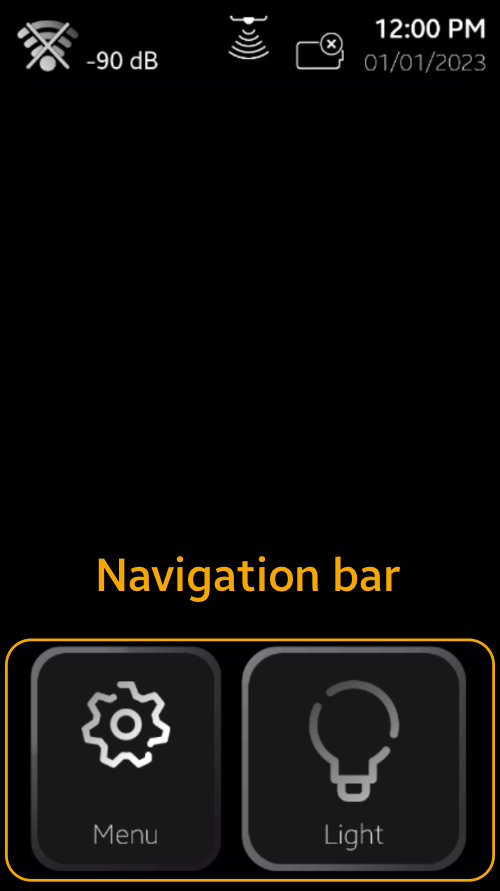
Navigation Bar
Contains the buttons to navigate to Menu and the rooms Light Switch.
 Menu
Menu Light Switch
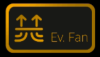 Evaporator Fan Switch
If evaporator fan switch is installed and enabled in Technician Settings the a Evaporator Fan button will appear at the bottom of the menu button.
To avoid displacing cold air with warm air when users are opening the door, press Evap. Fan Switch and the evaporator fan will stop blowing when the door is opened; the fan will restart according to user-selectable time and temperature conditions (see 3.1.5 for details on how to set up this function).